Showing posts with label BHG. Show all posts

10 May, 2013

Weekend Projects: Wonderful Wall Art - Part 1...


String Artwork
To make this tree-motif string art piece, coat a piece of plywood with black interior latex paint. Sketch a tree lightly in pencil. Begin pounding 1-inch white nails into the plywood along the design at random intervals. Tie nylon cord to the lowest, left-most nail and begin looping the cord around the surrounding nails. Keep the nylon taught at all times. Work your way up the tree and extend out to each branch, ending at the top. Tie a tight knot at the top-most nail. Finish by tying 2-inch pieces of color cording to a few nails at the tips of the branches. Display in an oversize frame, or cut and miter moulding to border the plywood.
 
 
Stenciled Wall Art
A blank white wall in this dining room gets a boost of color thanks to a brightly colored stenciled canvas. To get the look, stencil an ikat pattern (or any other pattern you like) onto canvas and stretch it over 1x2-inch boards at the top and bottom.

Printable Wall Art
Recreating this small art piece is as simple with this free download. Simply download, print and frame, or use a photo transfer method to put the print on canvas or a block of wood

Travel Documents
Keep vacation memories fresh with this easy and inexpensive wall art project. Cut a map to standard printer-paper size (8 1/2x11 inches). Use a word processor to create words, phrases, symbols, or photos that remind you of the special places you've traveled. Print your design on the map. Use spray adhesive to affix the map to a store-bought art canvas. Brush on two coats of decoupage medium, allowing the canvas to dry between applications to seal it. To give a newer map a weathered look, soak it in extra-strong coffee or black tea for an hour, then hang it up to dry.


Watercolor Flowers: This pretty project can be recreated using inexpensive watercolor.paints. Create a light wash by mixing water with one base color. Paint the entire surface of the stretched canvas with the color; let dry. To make flower stems, use a thin brush to paint a single line of light green watercolor paint. The lines need not be perfect; watercolor looks best when it’s applied organically. When the light green is almost dry, highlight it with a line of darker green; let dry. To create the flowers, place a nickel-size puddle of watercolor paint in a light tone onto the canvas at the top of one stem. Hold a straw vertically, straight over the top of the puddle. Blow into the straw to spread the paint into a sunburst pattern and let it dry. Repeat the process with a deeper, more saturated tone of the same color and let it dry again.


Hand-Drawn Wall Art
Even if your art skills are elementary, doodle on! With a marker in hand you can create one-of-a-kind wall art and unexpected updates for basic home decor in a matter of hours. Write a favorite quote, song lyric, or poem on a fabric scrap then frame, and enjoy. Draw a simple picture, then employ a blending technique to make it something truly special.

-------------------------------------------------------------------------------
So although the weekend might already be nearly over - this is the week that you can prepare you next weekend's projects such as these Wonderful Wall  Art projects that I have come across and wanted to share with you. Some have more creativity injected them to others but I do think there's a wall art project that can be done by any one - no matter your 'art' level!
Why not try one of these projects for your living room, bedroom or kids bedroom, or a guest room! Customise your colours and materials - and voila - you have an original décor wall art piece!eave me a comment or email me you project and how it turned out - I would love to hear from you.
Enjoy,



images pinterest, tumblr, bhg, hgtv, traditional home.

01 May, 2013

Get Your Curb Appeal On! Part 2.

 
In a Day - You Can > Renew planter beds
Get garden beds into shape by pruning growth, pulling weeds, planting flowers, and adding new mulch to restore colour that was taken away by sunlight and harsh weather. If stone or brick borders your bed, consider cleaning and resetting any pieces that are soiled or dislodged. If your border is old or tired-looking, try upgrading to stone or a decorative cast-concrete edging system. Shortly I will post on Garden Bed Edging Ideas to help you achieve a sympathetic and fresh new look for your garden beds.
 
In a Weekend You Can - Add arbours or fence panels
Arbors, garden gates, and short sections of decorative fence panels will enhance your garden and the value of your home. These amenities can be found in easy-to-build kits or prefab sections you simply connect together. For best results, paint or stain these items with colours already on your house.
 
 
In a Weekend You Can - Add outdoor art
Give your yard a little spunk by adding weather-resistant artwork. Choose pieces that complement your home's natural palette and exterior elements. Birdbaths, metal cutouts, sculptures, and wind chimes are good choices for outdoor art. Water sculptures not only function as yard art, but the burbling sounds soothe and make hot days feel cooler. Place fountains on level ground in optimum hearing and sight vantage points. Avoid spots in leaf-dropping range.


In a Weekend You Can - Add shutters or accent trim
Shutters and trim add a welcoming layer of beauty to your home's exterior. Shutters also control light and ventilation, and provide additional security. Exterior shutters can be made of wood, aluminium, vinyl, composite, or fiberglass. New composite materials, such as PVC resins or polyurethane, make trim details durable and low maintenance.


In a Month You Can > Renew paint, siding, and trim
An exterior facelift (new paint, siding, or trim details) automatically transforms the look of a home. Periodic maintenance of that exterior surface is the surest way to keep your house looking its best. Any obvious defects, such as cracked or rotting material, can downgrade the aesthetic and quickly turn away potential homebuyers. Once defects are repaired, look for ways to add personality with colour, trim, or shingles

 
 
In a Month You Can - Dress up the driveway
If your driveway is cracked or stained or has vegetation sprouting from it, you can upgrade it without doing a complete redo. First repair the cracks and stains (and kill the weeds), then dress it up by staining the concrete or affixing flagstones. If you need more room to move your car or park, add stone, brick, or pavers to the sides of the drive to widen it with flair.
----------------------------------------------------------------------
 
Following from my initial post on Palatial Living Get Your Curb Appeal On! Part 1, true to my word - here is the follow up with Part 2 on specific areas and ways you too can get your home ready as a property ready to sell meeting market expectations....
Enjoy,
 
 
images & subtext via bhg, pinterest, country living,
tumblr, house beautiful.
 

18 April, 2013

Palatial Paint Prowess...

 
Zigzag Chevron
Tap into the chevron trend and apply the pattern to your walls or another surface. Creating a precise chevron pattern requires a bit of math. Click the link below to learn how to measure and map out a chevron design.
 
 
Awash in White
   This simple faux finish technique adds depth and pattern to plain wood floors and works best on light woods. Start with unfinished wood or flooring that has been sanded to remove all of the existing finish.
 
Tone-on-Tone Stenciling
Stenciling brings pattern to walls and an interesting break from solid hues.
 
Houndstooth Pattern
Add this pattern to your walls for a statement that is both timeless and trendy. Houndstooth is a classic design, while the oversize scale and bright colours of this application keeps it fresh. 
 
Perfect Patina
Give a piece of wood furniture a distressed finish.
This simple technique uses paint, sandpaper, and a few basic supplies.
 
Kitchen Floor Stencil
Put pattern underfoot by stenciling your floor. Click the link below to see how to stencil a floor and get the free pattern used in this project.Get the floor stenciling how-to. 
 

Lighter than Lace
Brighten a basic solid-color lamp base with delicate motifs. A white oil-paint marker is the perfect tool to put your sketches in the spotlight. Draw simple spirals and interlocking paisley or flower patterns for an intricate look. Start at the top and work your way down for the best results.
----------------------------------------------------
 I truly believe that paint can change [almost] anything - be it a fresh coat on the walls, an update of a door or trim, or a change up for some old furniture. Here are some fabulous tips on where you can add a new look, with a creative approach, in an inexpensive way... I found some great ideas via BHG.com , HGTV, Elle Décor, and Pinterest, and had to share them with you.
I particularly love the chevron wall  - great for an office, or a children's teen room; and especially loving the tonal stencil-ing on the timber floor, I think this is a great technique when done in simple pattern by the home DIY-er, and if you're looking for a more of intricate pattern then think about hiring a professional stencil painter to apply it for you - it will be worth it! I love the floor stencil design a little while back I saw on 'Million Dollar Decorators' in the amazing home renovation of Designer Mary McDonald
What's your favourite way to decorate and update with paint?
Love to hear from you.
Enjoy,
 
Blue and white chevron floors by Mary McDonald

 Ashley floor stencil picture via  Design Sponge
images via StyleWatch 221 Vision, Design Sponge, Pinterest, & BHG, HGTV

05 February, 2013

Sure Ways To De-Clutter Your Home!

New Year - New Clean Up!
                                      Palatial Living's TOP 5 Stress-Less DeClutter Tips

1. The Scout
If you love that family and friends can rely on you to handle any situation, but your tendency to keep things comes from the anticipation that you might need it someday, you might have a scout's organization personality. So in order to let go, try creating a catch phrase to ask yourself that will help you identify items you no longer use frequently. 
You can also set boundaries before you begin to declutter. Determine how many of the same type of item you should realistically keep, and then make yourself follow those rules.Try asking yourself, "How often am I really using this?" Or, "In what situation will I really need this?" You'll soon start to realize that you'll never need a lot of the items you're holding on to. 

                                                            2. Purge Old Paperwork
Getting rid of old office paperwork is extremely liberating. Tossing random notes and old checklists and files quickly transforms an office into a place where you can think. 
Create a box to hold papers that need shredding as you sort, and then shred them while you watch television to make the time go by quickly. When you've cut through the backlog of papers, start fresh and shred papers immediately after you've sorted the mail.

3. Restful RetreatMake your bedroom a haven by surrounding yourself with things that bring you comfort and peace. Let go of furniture and other objects in the room that take up space without adding value. If space allows, carve out a nook for a reading chair and ottoman or a chaise. You can also layer your bed with blankets that add color and warmth. Install artwork or use paint to customize and brighten your space.

                                                              4.Organize for Your Needs
An organized closet can help set the tone for the day ahead. When you can see everything you own, you can find things faster, get dressed with confidence, and feel ready to tackle the day. When deciding how you should organize a clothes closet, ask yourself the following: How do I look for things? How do I get dressed? How do I put things away? Sort your items into categories based on your responses. To make things even easier to find, try color-coding items within your categories.

                                                          5. Children's - Play Stations
When toysbooks, and dress-ups have proper homes, children can participate in the cleanup process and help keep clutter to a minimum. Consider dividing a bedroom or playroom into activity stations to create clear separation. Make sure children have easy access to items they gravitate to frequently, such as a basket for books. Avoid oversize containers that make it hard for children to find toys, and keep lids to a minimum -- except on items you want to control access to, such as art supplies.
-----------------------

With my first post of the new  year I do this some 5 weeks into the new year - A BIG Hello & Happy New Year to you! After coming back from holidays in wonderful Japan skiing and visiting Tokyo Disneyland I am back into it full mode! Hence my cleaning & de-cluttering post today!
I have gotten through all the washing from the holiday and tackled all Christmas things - away and sorted. Now I am planned to attack the office and the wardrobe!
What about you - what have you de-cluttered in your home recently?
Hopefully the tips here will give you a great guideline to get inspired to make some space i your life.
Enjoy, 


images & subtext via BHG.com & Palatial Living Pinterest

02 April, 2012

Gorgeous Easter Desktop ScreenSavers...

 
Eggs in a Row
To set this image as your desktop wallpaper, click Use This Desktop,
below, then right-click the large image and select Set as Background.
'Use This Desktop'
--------------------------
 
Need some desktop Easter inspiration? I found these sweet images on the American BHG [Better Homes & Gardens] site that you might want to use for each day leading up to Easter Sunday! Click on the the text below the image that says 'USE THIS DESKTOP' and you will be directed to the screen saver web page where you can download it and save it to your desktop images.
Maybe there's just one you like or maybe a couple or maybe you can't choose and will use all of them each day!
Have fun & Enjoy,

 Egg Carton 
To set this image as your desktop wallpaper, click Use This Desktop,
below, then right-click the large image and select Set as Background.

 Blossom & Hand Painted Eggs
To set this image as your desktop wallpaper, click Use This Desktop,
below, then right-click the large image and select Set as Background.


Silver Basket Eggs
To set this image as your desktop wallpaper, click Use This Desktop,
below, then right-click the large image and select Set as Background.
 

 Egg Decor for the Door
To set this image as your desktop wallpaper, click Use This Desktop,
below, then right-click the large image and select Set as Background.


Easter Blooms 

To set this image as your desktop wallpaper, click Use This Desktop,
below, then right-click the large image and select Set as Background.

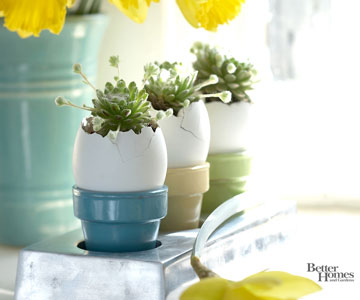
Egg Shell Potted Succulents
To set this image as your desktop wallpaper, click Use This Desktop,
below, then right-click the large image and select Set as Background.


Egg Plant
To set this image as your desktop wallpaper, click Use This Desktop,
below, then right-click the large image and select Set as Background.


images & links via BHG

Palatial Easter Projects...


Hanging Easter Egg Decoration
A bunch of pastel Easter eggs works as a festive decoration for your front door. Wrap plastic foam egg shapes (available at crafts supply stores) with crepe paper, and attach the ends with glue or a small straight pin. Add yellow ribbon, secured with small straight pins, and leave a long end for tying. Gather the eggs at various heights and tie the ribbons together. Hang the decoration from a removable adhesive hook or wreath hanger, and finish it off with a pretty bow.
-------------------
This weekend I put up my 'Easter Tree' - really several large gum tree sticks [over sized] from our yard, and hanging from them are several different coloured eggs in gold, blue, white & pink, and some little sparrow-like white & yellow with grey wooden birds. All hanging from colourful satin ribbon! Our little 'Is' was in awe this morning when she saw these eggs hanging from the 'sky' - usually they go straight into the pan for scrambled eggs for her breakfast!

So if you're thinking of getting some Easter decorations up this week... here's a few 'quick' ones that will see your home beautifully decorated, looking fun, and colourful for this wonderful celebration [on the Christian calendar]. Have Fun with them & Enjoy,


Colored Easter Egg Wreath
This easy-to-make Easter wreath adds a pop of pretty pastel color to your front door. Using an awl, poke a small hole in each end of 12 plastic eggs. Cut 1/2x3-inch strips of patterned paper, cutting small slits along the edges to reduce wrinkling.
Brush Mod Podge onto the back of one paper strip and apply to an egg, pressing out the excess glue or air bubbles; repeat until egg is covered. After all the eggs are covered, brush two thin coats of Mod Podge over the eggs, letting them dry in between coats; let dry. String the eggs onto a 16-gauge wire, allowing an extra inch at each end; clip the wire. Wrap one end around the other to form a wreath shape; cover wire ends with a pretty pastel ribbon and hang.


 Rustic Watering Can with Blooms & Eggs
Filling a rustic watering can with pink tulips, greenery, and pastel blue eggshells is the perfect decoration for spring. Stuff the watering can with floral foam to secure the stems. Add picks to blown-out eggshells to secure them as well. When you're finished creating the arrangement, wire it to your front door and cover the wire with ribbon. Tip: To keep flowers fresh, put the stems in water vials or heavy plastic bags filled with floral foam powder, available at floral supply stores.

 
Simple Natural Wreath
Japanese maple and sedum wired to a wreath form produce a pretty wreath that adds natural beauty to your door. Work with your local floral retailer for the supplies or substitute your own dried spring blooms or faux flowers and leaves. Hang it to your front door with a wide ribbon in a contrasting color, such as the green pictured here.


Beautiful Easter Door Decoration
A bouquet of pink tulips, along with greenery and dyed eggshells filled with daffodils, tuck neatly into an umbrella for a unique Easter door decoration. To make, tie a pretty pink ribbon halfway up a closed umbrella to create a makeshift vase for your arrangement. Create pockets between front ribs and tuck in tissue paper to support a crafts-store bird's nest, blown-out dyed Easter eggs, fresh flowers, and greenery, such as ferns and moss. When you're finished, wire the arrangement to a front-door hook to hang.
Tip: To keep flowers fresh, put the stems in water vials or heavy plastic bags filled with floral foam powder, available at floral supply stores


Jelly Bean - Easter Egg Front Door Monogram
Instead of a wreath, hang a fun monogram on your front door for spring. Paint a papier-mache letter (available at crafts) using acrylic paint in a pretty spring color, such as the soft purple shown here. For a single-color decoration, match the paint color to the jelly beans [or small easter eggs]; if you want a multi-color decoration mix pastel jelly beans and a single color of paint for the letter. Once the paint is dry, hot-glue the jelly beans to the front of the letter and let dry. Hot-glue a ribbon to the back to create a hanging loop and attach to your front door.

Native Floral Wreath
This pretty wreath made from dried flowers and leaves is a gorgeous decoration for your front door or wooden garden gate. This wreath is made with a base of dried sage and accented with celosia, globethistle, static, Liatris, and Eryngium. We stuck the dried elements into floral foam, working clockwise from the top.


Easy Flower Bouquet in Glass Bottles
Perfect for a garden trellis or front door, a small bouquet of annuals / flowers tucked into clear glass bottles makes a natural statement. Fill recycled glass bottles with your favorite flowers, mixing up the colors for a pretty spring decoration. To make this arrangement work on your front door, wrap wire around the bottle necks to secure to a door knocker or nail. Attach a strip of removable interlocking adhesive to the door and the bottle so the glass won't knock against the door every time it's opened.


images & subtext via bhg, house beautiful, country living, coastal living

LinkWithin

Related Posts with Thumbnails